

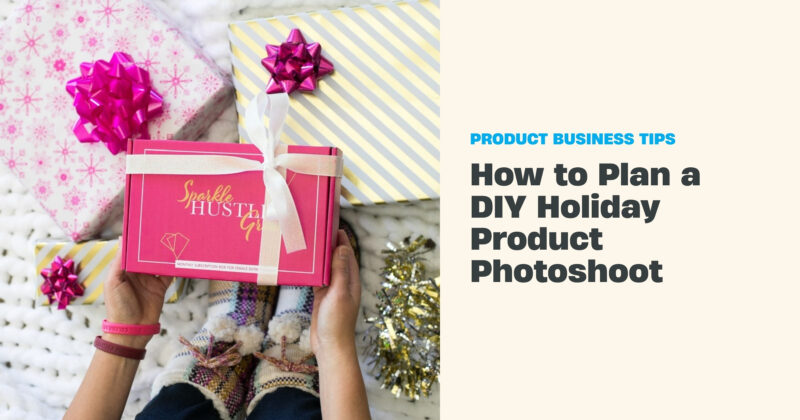
The short answer: Shoot your holiday product photos as early as you can, ideally by mid-November, so they’re live before Black Friday (Nov 27 this year). Use window light, a short shot list (hero, flat lay, lifestyle, detail, and gift-ready shots), and two or three props in colors that fit your brand. A phone, a window, and a free afternoon will get you most of the way there.
Holiday shoppers buy with their eyes. They’re scrolling fast, often on a phone, and looking for something that feels like a gift. Your product photos have about a second to say “this one.”
The good news: you don’t need a big budget or a studio rental to get there. You need a plan, decent light, and enough lead time to actually use the photos.
When should you take holiday product photos?
Now, if you haven’t yet. Shoppers start browsing in early November, and the big shopping weekend lands right after Thanksgiving: Black Friday is Nov 27, Small Business Saturday is Nov 28, and Cyber Monday is Nov 30.
Working backward, that means:
- This week or next: plan and shoot
- By Nov 20: edit and upload to your shop, emails, and ads
- Thanksgiving week: photos are live everywhere and you’re focused on orders, not editing
For next year, put the shoot on the calendar for late summer or early fall. Future you will be grateful.
What holiday product photos do you need?
A short shot list keeps you from walking away with 200 photos of the same angle. Here’s a good starting set for each product:
- Hero shot. The product alone on a clean background. This is your main listing photo, so keep the holiday touches light or skip them.
- Flat lay. Shot from directly above, with a few props arranged around the product. Great for Instagram and email headers.
- Lifestyle. The product in use, in a cozy setting: on a blanket, by a mug of cocoa, in someone’s hands. This is what makes people picture it as a gift.
- Detail. A close-up of texture, stitching, labels, or packaging. It answers the “what’s the quality like?” question.
- Gift-ready. Wrapped, tagged, or in its gift box. If you offer gift wrap or ship gift-ready, show it.
- Bundle. A few products together, for gift sets and “shop the look” posts.
- Space for text. A few photos with empty space on one side, so you can add sale details for social or email.
Shoot every setup both horizontal and vertical. Your website wants one, and stories and reels want the other.
How do you get good light without a studio?
Use a window. Natural light is free and flattering, and it beats a ceiling light every time.
- Side light works best. Set up next to a window, not facing it or with your back to it.
- Overcast days are your friend. Soft, even light means fewer harsh shadows. On a sunny day, hang a sheer white curtain or shower liner over the window.
- Bounce the light. A white foam board from the craft store, propped opposite the window, fills in shadows on the dark side of your product.
- Turn off the overhead lights. Mixing daylight with indoor bulbs makes your photos look yellow or muddy.
Your phone is enough. Wipe the lens, turn on the grid, tap to focus on the product, and use a small tripod so every shot in a set lines up.
How do you choose holiday props that don’t steal the show?
The product is the star. Props are the supporting cast.
- Pick two or three colors and stick to them. They don’t have to be red and green. Choose colors that fit your brand, so your holiday photos still look like you.
- Go for texture. A chunky knit blanket, kraft paper, linen, a little greenery, ribbon. Texture says “cozy” without shouting “holiday.”
- Lean winter, not just Christmas. Snowy, cozy, and gift-y photos keep working through January sales and Valentine’s gift guides. A photo covered in Santa hats expires on Dec 26.
- Edit before you shoot. Lay out everything, then remove one thing. Then remove one more.
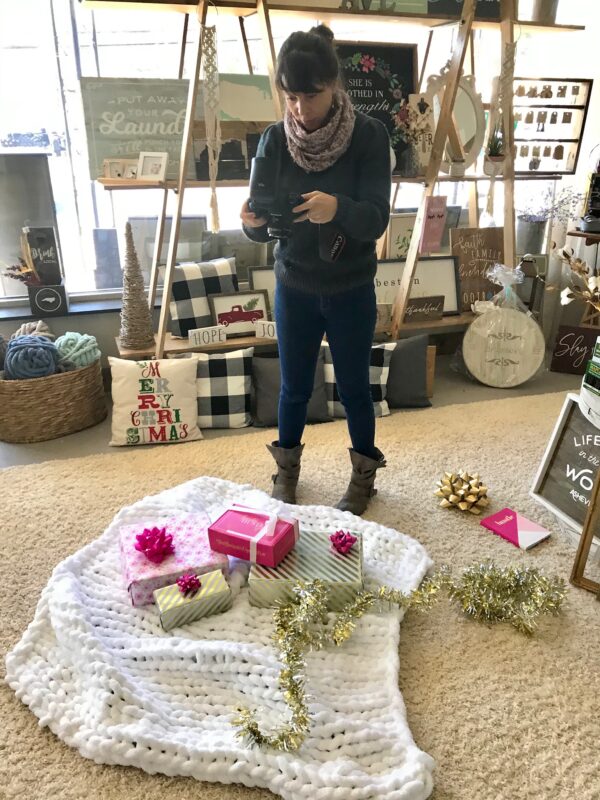
Behind the scenes at a real holiday shoot: a chunky knit blanket, a few wrapped boxes, some tinsel, and plenty of window light.
When I ran a subscription box, our holiday shoot had pajamas, gift wrap, and a lot of pink, which fit that brand. The photos that kept earning their keep long after December were the simplest ones: a clean flat lay, a pair of hands untying a ribbon. Those are worth getting even if you get nothing else.
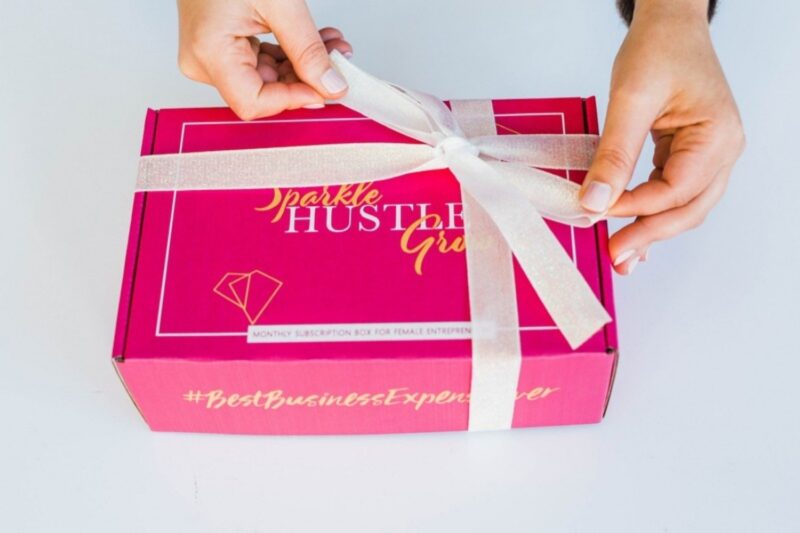
Hands-only detail shots show scale and feel personal, and nobody has to be camera-ready. Photo: Melissa McElrath Photography
Should you include people in your product photos?
If you can, yes. Even just hands make a product feel real and show its size. A friend in cozy pajamas holding your product does more than any prop.
A few tips:
- Hands-only shots are the easiest place to start, and nobody has to be camera-ready.
- Plain clothes in your brand colors keep the focus on the product.
- If someone other than you appears in the photos, get a simple written okay to use them in your marketing.
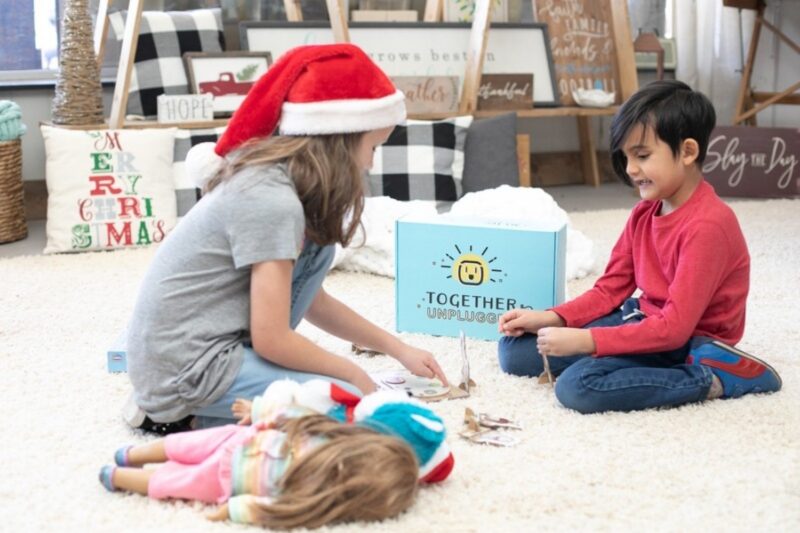
A lifestyle shot shows the product in use, so shoppers can picture it under their own tree. Photo: Becca Bond Photography
How do you plan the shoot day?
A little prep saves a lot of reshooting.
- Make a shot list from the section above, product by product.
- Make a mood board. Save five or six photos you love so you have something to aim for.
- Prep your products. Dust, steam, lint-roll, and remove stickers. The camera sees everything.
- Batch your setups. Do all the flat lays, then all the lifestyle shots, so you’re not rebuilding the set every time.
- Take more than you think you need. Then back them up before you start editing.
Should you DIY or hire a product photographer?
Both have a place. DIY is great for social posts, quick restocks, and testing ideas. A professional photographer is worth it for the photos that carry the most weight: your website hero images, your best sellers, and anything with people in it. Many brands do one professional shoot a year and fill the gaps themselves.
Where can you shoot product photos in Asheville?
If your home doesn’t have great light (or every flat surface is covered in inventory), you have options. Ernest members have a photo studio right in the building, stocked with the essentials like box lights and backdrops. A shoot can happen between packing orders instead of on the dining table, and you don’t have to haul gear in or set it all up from scratch. (New to the idea? Here’s how co-warehousing works.)
After the shoot
- Edit consistently. Use the same few adjustments on every photo so your shop looks cohesive.
- Name your files. “wool-slippers-gift-box.jpg” beats “IMG_4823.jpg” for search.
- Write alt text. Describe what’s in the photo. It helps shoppers using screen readers, and it helps search engines understand your products.
- Map every photo to a job. Listing, email, ad, Instagram, Pinterest. If a photo doesn’t have a job, you probably don’t need it.
Frequently asked questions
When should I take holiday product photos?
As early as possible. For this season, aim to finish by mid-November so photos are live before Black Friday on Nov 27. Next year, shoot in late summer or early fall.
Can I take holiday product photos with my phone?
Yes. A recent phone, window light, and a small tripod are enough for most social and shop photos. Clean the lens and turn off overhead lights.
How many holiday product photos do I need?
Start with five per product: a hero shot, a flat lay, a lifestyle shot, a detail shot, and a gift-ready shot. Shoot each one horizontal and vertical.
What are good props for holiday product photos?
Texture over clutter: knit blankets, kraft paper, ribbon, greenery, and mugs. Stick to two or three colors that match your brand.
What’s the best background for product photos?
For your main listing photo, a plain white or light neutral background. For social and email, a styled background with a few props works better.